Refresh this page to invite more people and get the cool gift 🔥

How to Add a DKIM Record to Namecheap - Step-by-Step Guide

Without DKIM, hackers can alter the content of an email for fraudulent purposes.
Therefore, DKIM records play a vital role in establishing trust with email servers.
If you’re doing email outreach, you need DKIM.
It not only increases your open rates but also improves security.
If Namecheap is your domain provider, follow our guide below to set up a DKIM record for it.
DKIM Ins and Outs 🔣
DKIM is an email authentication method that allows email servers to verify the origin of an email.
DKIM helps email servers answer the question: Is this email coming from the domain it claims to be coming from?
The authentication mechanism also verifies that the email’s content hasn’t been altered while being transmitted.
For the authentication, two keys are used: a public one and a private one.
The public key is automatically added when you add your DKIM record to your DNS. This public key is shared with email servers.
The private key works differently as it is used to sign outgoing emails. The private key must remain private to ensure DKIM’s security.
If an email server can successfully decrypt the digital signature created by the private key and it matches the email’s content, then authentication occurs.
But what if an email fails authentication? It can either be delivered normally, get sent to spam, or get rejected altogether.
What to do with unauthorized emails is determined by another DNS record called DMARC.
Steps to Add DKIM to Namecheap 🚶♀️
Generate your DKIM
You need a DKIM to add to GoDaddy. Usually, you can generate one in your email service provider account, i.e., the tool you’re using to send email.
- Go to your email service provider’s domain settings
- Look for domain or email authentication settings
- Go to “DKIM settings” or similar. This could also be named “DKIM,” “DomainKeys,” or “Email Authentication.”
- Now look for a button that says “generate DKIM keys” and click on it. If you can customize your DKIM, do so based on your ESP’s recommendations.
- Now copy the generated DKIM record and the DKIM selector your ESP should have provided.
Add DKIM record to Namecheap
Next, it’s time to add the DKIM record you just generated to Namecheap.

- Log in to Namecheap
- Click on “Domain list” in the sidebar on the left
- Click on the “Manage” button across your domain name
- Now click on “Advanced DNS”
- Click the “Add new record” button
- For type, select “CNAME record”
- In “Host” enter selector._domainkey - Change selector to the DKIM selector that your ESP provided.
- In the value field, paste your DKIM record
- Click save
Enable DKIM
Now, it’s usually time to enable DKIM for your ESP.
Return to your ESP's DKIM settings and look for an enable button. Click on it.
More Ways to Avoid the Spam Folder 📧
It can take up to 48 hours for your DKIM record to be active.
It’s an excellent opportunity to consider the rest of your technical setup.
For best email deliverability, you need to have your technical setup on point.
Setting up DKIM is a good step in the right direction, but it’s not enough.
You also need to:
- ➡️ Set up your MX records
- ➡️ Set up your SPF records
- ➡️ Set up your DMARC records
- ➡️ Set up your Custom Tracking Domain
When all is set up, you need to warm up your email.
This means gradually increasing sending volume and frequency while also getting engagement for your emails.
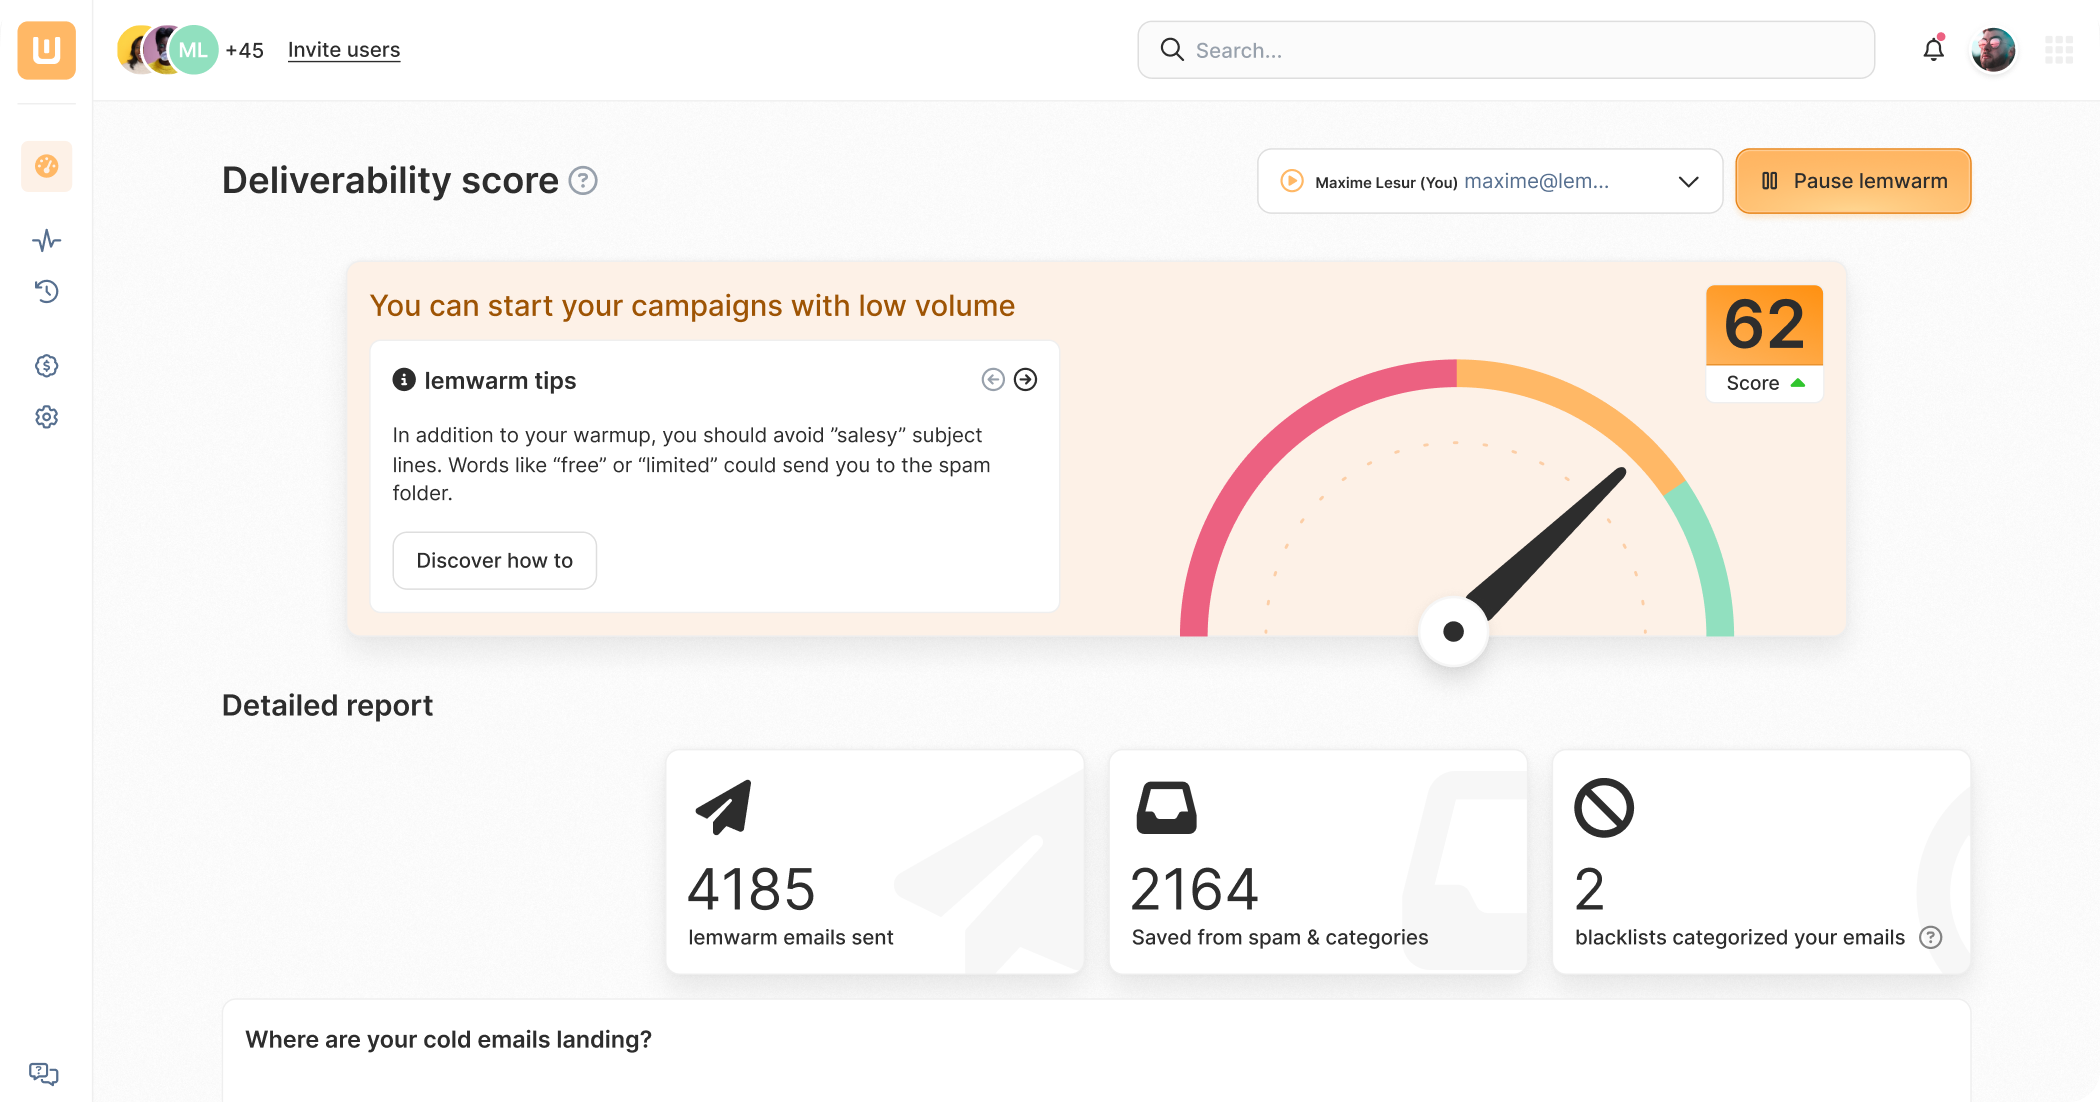
Doing all of this manually is nearly impossible. That’s why there are warm-up services like Lemwarm.
lemwarm, which won a Reddit poll for best email warm-up service, steadily helps you build your sender reputation until you’re ready to start your email outreach.
All of lemwarm’s features have been designed to keep you out of the spam folder.


Send emails that actually get delivered with